Just like you need clean air to breathe, your car’s engine needs it to run properly. Think of the engine air filter as your car's lungs. It's a simple but vital component that stops dirt, dust, leaves, and other debris from getting sucked into the engine where it could cause serious damage. A clogged air filter starves your engine of the air it needs for efficient combustion. This can lead to sluggish performance, reduced fuel economy, and even increased emissions. Taking a few minutes to check and replace this filter is one of the easiest, cheapest, and most satisfying DIY tasks you can do. It keeps your engine healthy, saves you money on gas, and demonstrates the kind of responsible ownership that every car insurance company likes to see.
What Does an Engine Air Filter Do?
The engine air filter has one crucial job: to clean the air before it enters the engine. For every gallon of gasoline your car burns, it uses thousands of gallons of air. That air is pulled from the outside world and is full of contaminants. The filter, typically made of a pleated paper-like material, traps these harmful particles. When the filter gets clogged with debris, it restricts airflow. Your engine has to work harder to pull air in, which can lead to noticeable symptoms like lazy acceleration, rough idling, and a decrease in your miles per gallon (MPG). In extreme cases, a severely clogged filter can trigger the "Check Engine" light.
When Should You Replace It?
The general recommendation for replacing an engine air filter is every 15,000 to 30,000 miles. However, your owner's manual will provide the exact interval for your specific vehicle. It’s important to remember that this is just a guideline. Your driving conditions play a huge role. If you frequently drive on dusty gravel roads, in areas with a lot of construction, or in agricultural regions, your filter will get dirty much faster. In these environments, you should inspect the filter more often, perhaps every 6,000 miles or with every oil change. A visual inspection is the best way to know for sure when a replacement is needed.
Finding the Right Filter and Tools
Before you start, you need to get the correct replacement filter. Your owner’s manual will list the part number, or you can look it up online or at an auto parts store using your car’s year, make, and model. Filters are not one-size-fits-all, so getting the right one is essential for a proper seal. The good news is that you’ll need very few tools for this job. For most cars, you won't need any tools at all. At most, you might need a flathead screwdriver or a socket wrench to release the air filter housing. It's also a good idea to have a vacuum or some rags handy to clean out the housing.
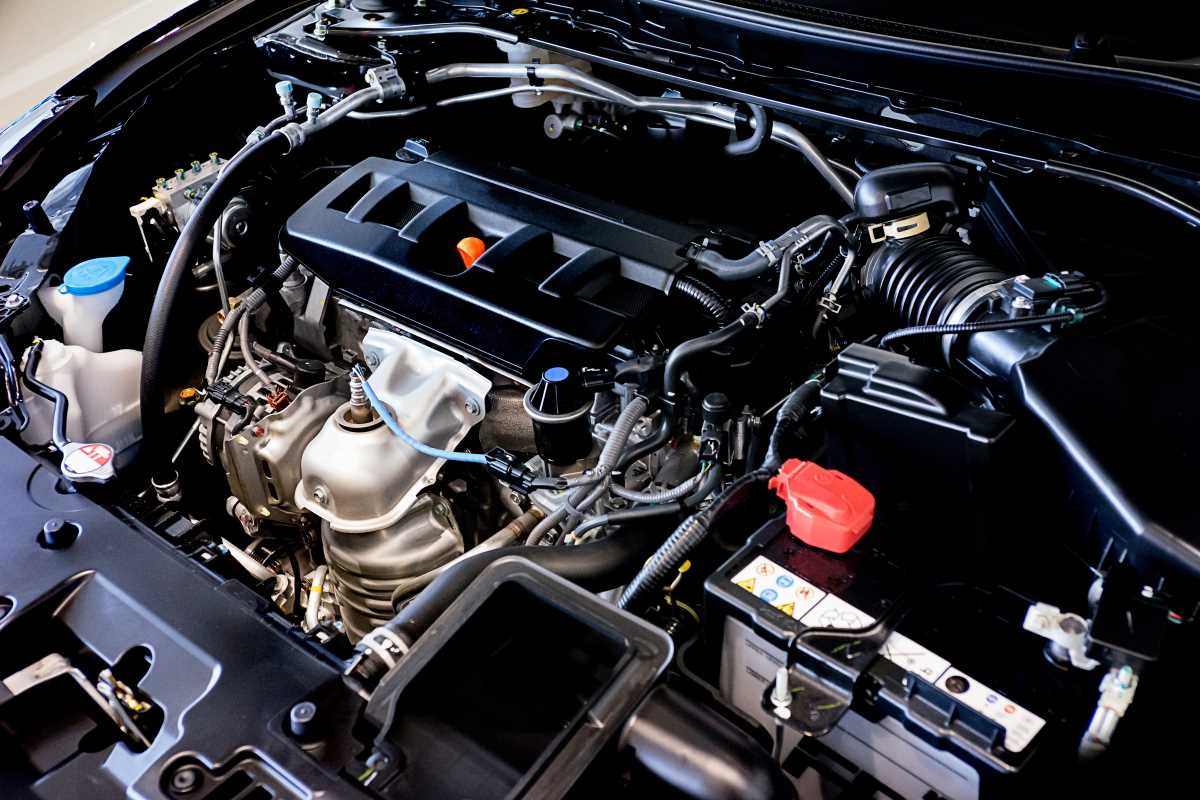
Step 1: Locate and Open the Air Filter Housing
First, park your car on a level surface and pop the hood. The engine air filter is located inside a large, black plastic box called the air filter housing or air box. This box is usually found on the top or side of the engine and has a large plastic tube or duct running from it to the engine. The housing is designed to be opened easily. Look for metal clips, clamps, or tabs around the edge of the box. Simply undo these clips, which are often spring-loaded, to release the lid. Some vehicles may use screws to hold the lid on, in which case you will need your screwdriver or wrench. Once the fasteners are released, you can lift the top half of the housing to expose the air filter inside.
Step 2: Inspect and Remove the Old Filter
With the housing open, you can now see the old air filter. Simply lift it straight out. Take a look at the filter. A new one is typically white or off-white. A used filter will be light gray, which is normal. If the filter is dark gray or black and visibly clogged with dirt, bugs, and leaves, it’s definitely time for a replacement. A good way to check is to hold the filter up to a bright light. If you can't see the light shining through the pleated material, it is too clogged to function effectively and needs to be replaced. If it's only lightly dirty, you might be able to extend its life by tapping it gently to knock out loose debris, but replacement is always the better option as they are inexpensive.
Step 3: Clean the Housing and Install the New Filter
Before you put the new filter in, take a moment to clean the inside of the air filter housing. Use a rag or a vacuum to remove any leaves, dirt, or debris from the bottom of the box. This prevents that loose dirt from getting sucked into your engine as soon as you start the car. Now, take your new filter and place it into the housing. It is designed to fit in only one way, so you can't get it wrong. Pay attention to the rubber gasket or seal around the edge of the filter. Make sure it is seated properly and evenly all the way around to create an airtight seal. An improper seal can allow dirty, unfiltered air to bypass the filter.
Step 4: Close Up and Final Checks
With the new filter seated correctly, place the lid back on the air box. Make sure it sits flush and that the rubber seal is not pinched. Re-secure the clips, clamps, or screws that hold the lid in place. If your housing uses screws, tighten them until they are snug, but be careful not to overtighten and crack the plastic. That’s it! The entire process takes less than 10 minutes. This simple DIY job typically costs between $15 and $30 for the filter, whereas a dealership or quick-lube shop might charge you $50 to $75 or more for the same service. Some modern cars may have a "maintenance required" light that you need to reset, a procedure you can find in your owner's manual.
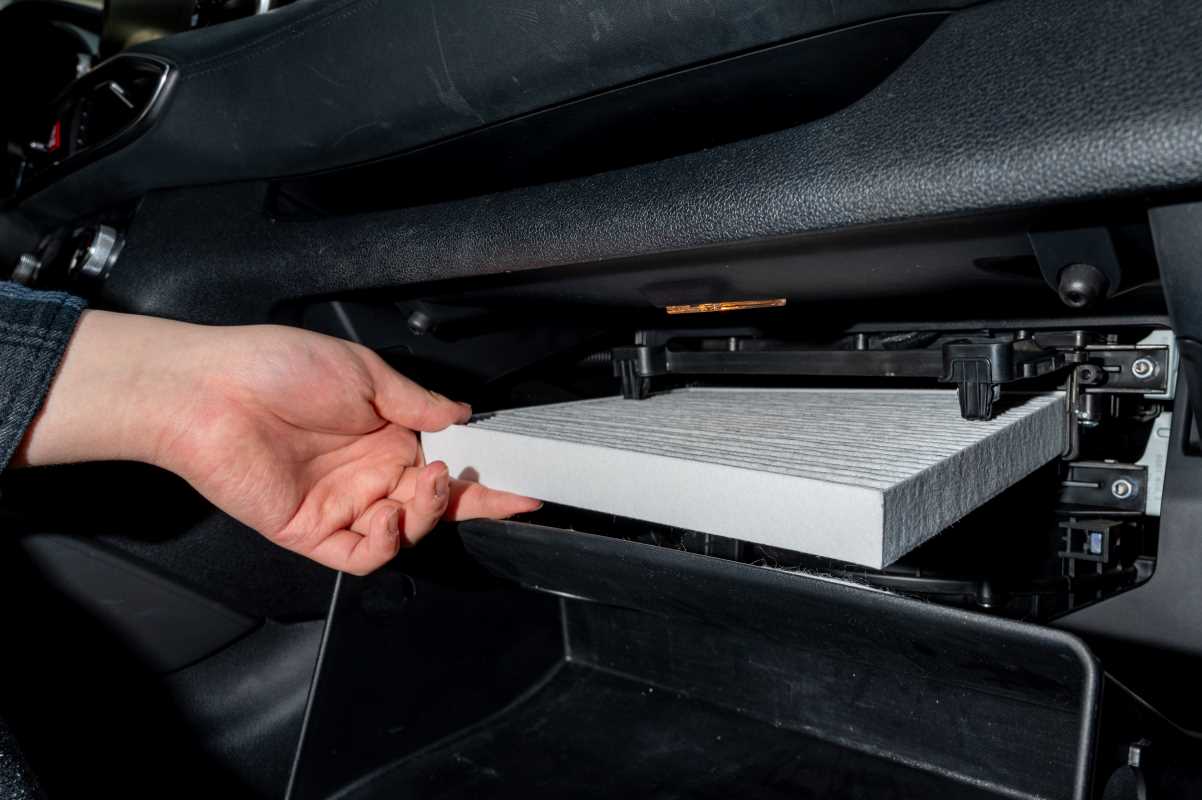
Don't Confuse it with the Cabin Air Filter
It’s important to know that your car has a second air filter called the cabin air filter. While the engine air filter cleans the air going into your engine, the cabin air filter cleans the air that comes into the passenger compartment through your heating and air conditioning vents. It traps dust, pollen, and other allergens, improving the air you breathe inside the car. This filter is usually located behind the glove box and is also an easy DIY replacement. Knowing the difference between the two helps you maintain your vehicle properly. A well-running car is a safer car, which reduces the chance you'll ever have to make an insurance claim for an accident caused by preventable mechanical failure.