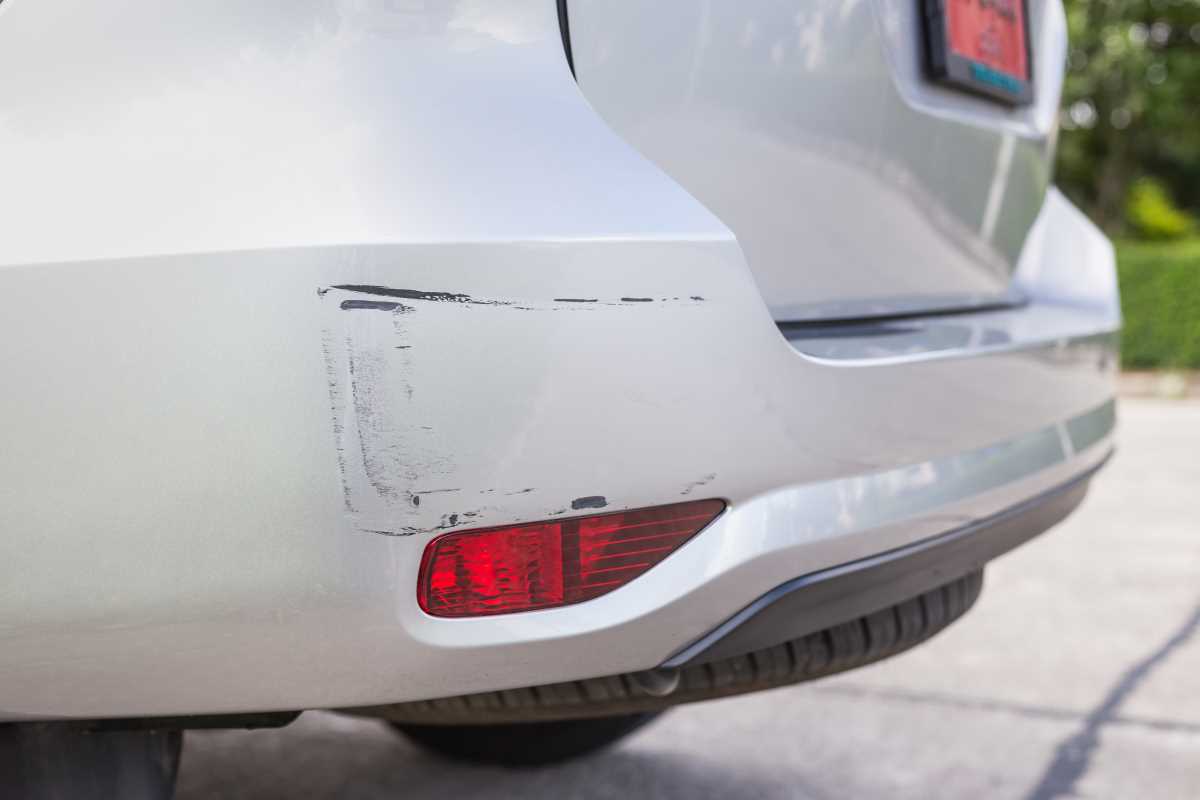
That first scratch on your car’s pristine paint job can feel like a personal insult. Whether it’s from a stray shopping cart, an overgrown branch, or a mystery culprit in a parking lot, a scratch can ruin your day and your car’s perfect look. Beyond just being an eyesore, scratches can lower your car's resale value and, if deep enough, expose the metal underneath to rust. While your first instinct might be to call a body shop or your insurance agent, many minor scratches can be fixed right in your driveway with a little patience and the right technique. Learning how to handle these small imperfections yourself saves money, gives you a huge sense of accomplishment, and helps you decide when a professional repair, or even an insurance claim, is truly necessary.
How Deep is the Scratch? The Fingernail Test
Before you grab any polish or sandpaper, you need to figure out what you’re dealing with. A car's paint is made of several layers: a primer coat over the metal body panel, then the color coat, and finally a protective clear coat on top. The depth of the scratch determines the repair method. A simple way to check is the fingernail test. Gently run your fingernail across the scratch. If your nail glides over it without catching, it's likely just a light scuff in the clear coat. These are the easiest to fix. If your nail catches in the scratch, it has probably gone through the clear coat and into the color coat. If you see a white or grey color at the bottom of the scratch, it’s down to the primer. If you see bare, shiny metal, it’s through all the layers of paint. For anything deeper than the clear coat, especially scratches down to the primer or metal, a professional repair is often the best bet to prevent future rust and ensure a perfect color match.
Prepping the Area for a Perfect Repair
Proper preparation is the secret to a successful scratch repair. You can’t get a good result working on a dirty surface. Start by thoroughly washing the scratched area and the surrounding panel with car soap and water. This removes loose dirt and grit that could cause more scratches during the repair process. After washing and drying, it’s a good idea to use a clay bar or a chemical decontamination spray to remove any embedded contaminants from the paint. This creates a perfectly clean canvas.
Next, use painter's tape to mask off the area around the scratch. This protects the surrounding paint from any accidental abrasion, especially if you are using more aggressive methods like sanding. Good lighting is also crucial. Work in a shaded area, out of direct sunlight, but use a bright work light or your phone’s flashlight to get a clear view of the scratch from different angles. This helps you monitor your progress and know when to stop.
The Toothpaste Trick and Polishing Compounds
For the faintest of scratches and scuffs that barely catch your nail, you might be able to use a very mild abrasive you already have at home. Whitening toothpaste can act as a super-fine polishing compound. Apply a small dab to a clean, damp microfiber cloth and rub it into the scratch with gentle, circular motions. After a minute or so, wipe the area clean and check your progress. This method only works on the most superficial clear coat scuffs, but it’s worth a try for minor blemishes.
A much better and more predictable method is to use a dedicated automotive scratch remover or polishing compound. These products are specifically designed for car paint. Apply a small amount of the compound to a foam applicator pad. Using light to moderate pressure, work the product into the scratch using back-and-forth or circular motions. Work in a small area, about one square foot at a time. The fine abrasives in the compound will gently level the clear coat, effectively erasing the scratch. Wipe away the residue with a clean microfiber towel and inspect your work. You may need to repeat the process two or three times to fully remove the scratch.
Wet Sanding for Deeper Clear Coat Scratches
If a scratch is deep enough to catch your fingernail but hasn't gone through the clear coat, you may need to step up to wet sanding. This technique should be approached with caution, as it involves removing a thin layer of the clear coat. It's a more advanced DIY task, and if you’re not careful, you can sand right through the clear coat, which would require a professional repaint. If you decide to proceed, you will need very fine-grit automotive sandpaper, typically 2000-grit or 3000-grit, and a small bucket of water with a few drops of car soap.
Soak the sandpaper in the soapy water for about 10 minutes. Wrap the sandpaper around a small, firm sanding block for even pressure. Gently sand the scratch itself, always keeping the surface wet. Use very light pressure and only sand in one direction, following the line of the scratch. The goal is not to remove the scratch completely, but to dull the area and level the edges of the scratch with the surrounding paint. After a few passes, wipe the area dry and check your progress. When the original scratch is no longer visible and you just see a dull, hazy patch, you are done sanding. This hazy area must then be corrected with a polishing compound, and possibly a heavier cutting compound first, to restore the shine and clarity to the paint.
Using Touch-Up Paint for Chips and Deep Scratches
When a scratch is so deep that it goes through the color coat and down to the primer or bare metal, polishing won't fix it. The only way to repair it is to add new paint. You will need to buy a touch-up paint pen or bottle that perfectly matches your car’s factory color. You can find the paint code for your vehicle on the sticker inside the driver’s doorjamb.
Clean the scratch thoroughly with a degreaser or isopropyl alcohol. If the scratch is down to bare metal, it is essential to first apply a tiny amount of automotive primer to the scratch with a very fine-tipped brush to prevent rust. Once the primer is dry, shake the touch-up paint very well and apply a thin, even layer of color inside the scratch. Don't try to fill it in one go. It's better to apply several very thin coats, letting each one dry completely, than one thick, blobby coat. The goal is to build up the paint until it is level with the surrounding surface. After the color coat is fully cured, which can take several days, you can apply a layer of clear coat from a touch-up pen to protect the repair.
Finishing Touches: Blending and Protecting Your Work
After any scratch repair, whether it was polishing, sanding, or touch-up paint, the final step is to blend the area and protect it. If you wet sanded, you will need to use a cutting compound followed by a polishing compound to remove the sanding marks and restore the gloss. Even if you only used a polish, going over the entire panel with a fine finishing polish will help ensure an even shine and blend the repaired spot perfectly.
Once the paint looks perfect, you need to protect it. Apply a layer of high-quality car wax or a more durable paint sealant. This not only adds a brilliant shine but also provides a protective barrier against UV rays, water, and future minor scratches. If you used touch-up paint, check the manufacturer's instructions for curing time before you apply wax or wash the car aggressively. This might be as long as 30 days. Taking care of small scratches yourself can save you hundreds of dollars compared to a body shop. It also means you don't have to file a small cosmetic insurance claim, which could impact your rates and requires you to pay a deductible that might be more than the repair cost itself.
