There are few sounds more frustrating than the weak click-click-click of a car that refuses to start. A dead battery can leave you stranded at the worst possible moment, turning a normal day into a major hassle. While calling for roadside assistance is always an option, learning to replace a car battery yourself is a game-changing DIY skill. It saves you a significant amount of money on parts and labor, puts you in control of the situation, and gives you the confidence that comes from knowing how your car works. From an insurance perspective, having a reliable vehicle is key to avoiding breakdown-related incidents. A dead battery on a dark road or in a busy intersection is a safety risk. Mastering this task shows you’re a responsible car owner who values prevention and preparedness.
Is it Really the Battery?
Before you rush out to buy a new battery, it's wise to confirm it’s the actual problem. A no-start condition can also be caused by a bad alternator or a faulty starter. The classic sign of a dead battery is the engine not cranking at all, accompanied by dim or flickering dashboard lights and that tell-tale clicking sound. If the engine cranks over slowly but doesn't start, the battery is a likely suspect. In contrast, if the engine cranks at a normal speed but won’t turn over, the issue might be fuel or ignition-related. If you hear a single, loud click when you turn the key but nothing else happens, the starter could be the culprit. A simple test with a multimeter can give you a definitive answer. A healthy, fully charged car battery should read around 12.6 volts with the engine off. A reading below 12.2 volts suggests it needs a charge, and below 12 volts, it's likely time for a replacement.
Choosing the Right Replacement Battery
Buying a new car battery isn't as simple as grabbing the first one you see. You need the right one for your specific vehicle. The most important factor is the "group size," which dictates the battery's physical dimensions and the location of its positive and negative terminals. Your owner's manual or a quick online search will tell you the correct group size, such as Group 24F or Group 35. Another key number is Cold Cranking Amps (CCA), which measures the battery's ability to start an engine in cold weather. You should choose a battery with a CCA rating that meets or exceeds your car manufacturer's recommendation. Finally, decide between a traditional flooded lead-acid battery and an Absorbed Glass Mat (AGM) battery. AGM batteries generally cost more but offer better performance and a longer lifespan, and they are often required for vehicles with start-stop technology.
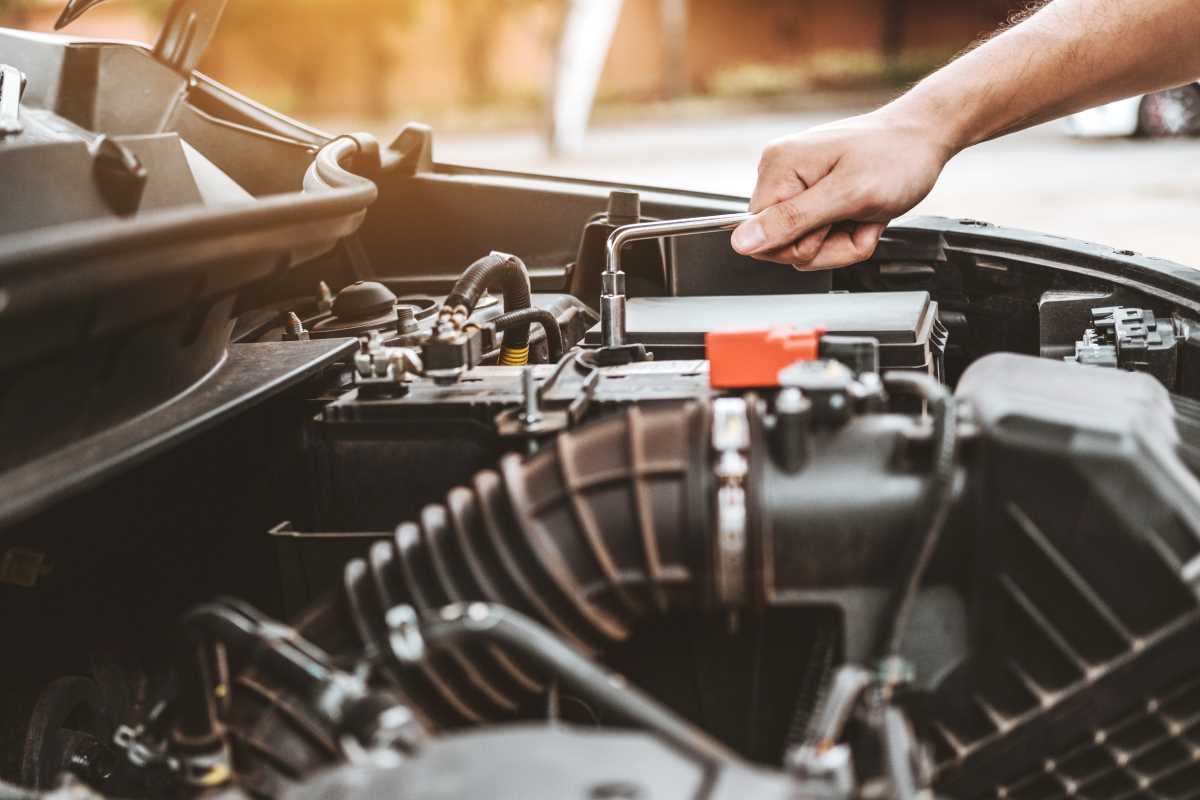
Gather Your Tools and Prep the Area
Safety and preparation are essential for a smooth battery swap. Always work in a well-ventilated area and wear safety glasses and gloves. Car batteries contain corrosive sulfuric acid, so protecting your eyes and skin is a must. You will need a few basic tools: a wrench or socket set to loosen the terminal clamps and the battery hold-down bracket, a wire brush or dedicated terminal cleaning tool, and some anti-corrosion spray or grease. A very useful, but optional, tool is a 12V memory saver. This small device plugs into your car’s OBD-II port or cigarette lighter and provides just enough power to keep your radio presets, clock, and other computer settings from being erased when the battery is disconnected.
Step 1: Remove the Old Battery Safely
With your tools and safety gear ready, it’s time to disconnect the old battery. The order of operations here is critically important to prevent sparks and short circuits. Always start by disconnecting the negative cable first. It is usually black and connects to the terminal marked with a minus sign (-). Use your wrench to loosen the nut on the terminal clamp, then twist and pull the cable off the terminal post. Tuck it to the side where it cannot accidentally touch the battery again. Next, repeat the process for the positive cable, which is usually red and marked with a plus sign (+).
Once both cables are disconnected, locate the battery hold-down bracket. This is a clamp or strap at the base of the battery that secures it in place. Use your wrench to loosen and remove the bracket. With the hold-down removed, you can now lift the old battery straight out of the tray. Be prepared; car batteries are surprisingly heavy, weighing anywhere from 30 to 50 pounds. Lift with your legs, not your back.
Step 2: Install the New Battery Correctly
Before you drop the new battery in, take a moment to clean the battery tray of any dirt or corrosion. Also, use your wire brush to thoroughly clean the inside of the battery terminal clamps until they are shiny. A clean connection is vital for good electrical flow. Place the new battery into the tray, making sure it is oriented correctly with the positive and negative terminals on the proper sides. Reinstall the hold-down bracket and tighten it until the battery is secure and doesn't wiggle. Do not overtighten, as you could crack the battery case.
Now it's time to reconnect the cables, and you must do it in the reverse order of removal. Connect the positive cable first. Place the clamp over the positive terminal and tighten the nut until it is snug. Then, connect the negative cable to the negative terminal and tighten it. Applying a thin layer of anti-corrosion grease or spray to the terminals after they are connected will help prevent future buildup. Give both cables a gentle tug to ensure they are tight and the connection is solid.
Step 3: Final Checks and Resets
With the new battery installed, your car should start right up. However, the job isn't quite done. Because the vehicle lost power, you will likely need to reset your clock and radio station presets. Some vehicles may require a "relearn" procedure for the power windows or idle speed. Your owner's manual will have instructions for these simple resets. If your Tire Pressure Monitoring System (TPMS) light comes on, driving for a few miles will usually allow it to reset itself. The cost of a new battery and doing it yourself can range from $100 to $300, while having a shop or roadside service do it can easily add another $100 or more in labor and service fees.
Proper Disposal and Aftercare
A car battery is hazardous waste and cannot be thrown in the regular trash. The good news is that you will almost always get money back for your old one. When you buy a new battery, you will pay a "core charge," which is a deposit that is refunded to you when you bring the old battery back to the retailer. This ensures the lead and acid are recycled properly. After installation, it's a great idea to double-check your work. With the car running, a multimeter should show a reading between 13.7 and 14.7 volts at the battery terminals, which confirms that your alternator is correctly charging the new battery. This simple, hour-long task not only saves you money but also prevents the kind of inconvenient breakdown that could lead to a more serious incident.