A single burned-out headlight or taillight might seem like a small problem, but it's a major safety issue that can get you a traffic ticket or cause you to fail a vehicle inspection. Your car's lights are its primary way of communicating with other drivers, signaling your intentions to turn, brake, or simply announcing your presence at night. Driving with a faulty bulb compromises that communication, dramatically increasing your risk of an accident, especially in poor visibility. From an insurance standpoint, a well-maintained car with fully functional safety equipment is the hallmark of a responsible driver. While a claim won't be denied for a bad bulb, any accident resulting from another driver not seeing you could create a complicated situation. Fortunately, replacing most common bulbs is one of the simplest and most rewarding DIY car maintenance tasks you can learn.
Is It the Bulb, the Fuse, or Something Else?
Before you rush to the store, it's smart to confirm that the bulb itself is the problem. The first suspect is a blown fuse. Your owner's manual will show you the location of your car's fuse boxes and a diagram of what each fuse controls. Find the fuse for the specific light that's out, pull it, and inspect it. If the small metal strip inside is broken, the fuse is blown. Replacing it with a new one of the exact same amperage might be all you need to do. If the new fuse blows immediately, you have a short circuit that requires a professional diagnosis. If the fuse is fine, the problem could be a bad socket or wiring, but more than 90% of the time, the culprit is simply a burned-out bulb.
Know Your Bulb Type and Part Number
Not all bulbs are created equal. Most vehicles use halogen bulbs, which are inexpensive and easy to find. Some cars use High-Intensity Discharge (HID or Xenon) bulbs, which produce a brighter, whiter light but operate at very high voltages. The newest cars often feature LED lighting, which is extremely long-lasting but is often integrated into a sealed headlight assembly that cannot be serviced with a simple bulb swap. It is critical to replace your bulb with the correct type. Using the wrong wattage can generate too much heat, melting the housing or damaging the wiring. Your owner's manual is the best place to find the correct bulb part number, which will look something like "H11" for a headlight or "7443" for a taillight. You can also use the lookup guide at any auto parts store.
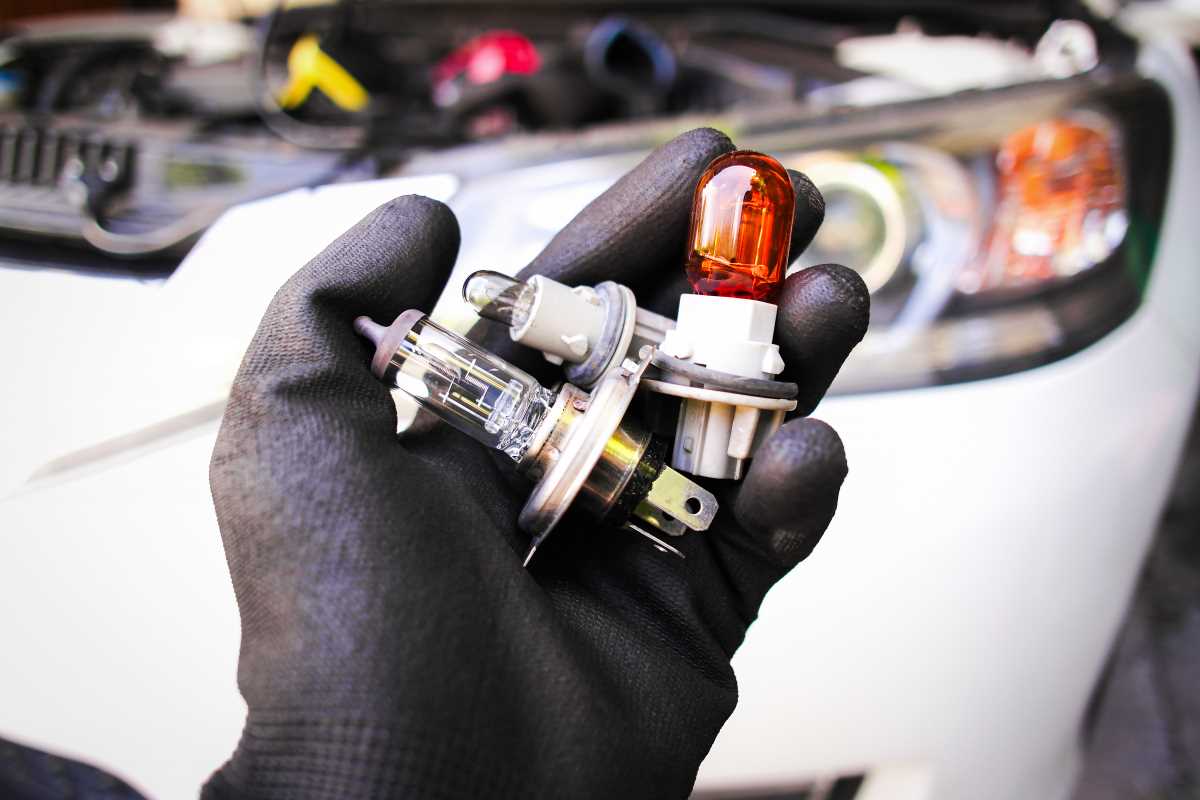
Tools and Preparation for the Job
For most bulb replacements, you'll need minimal tools, perhaps a screwdriver or a small socket wrench for some taillight assemblies. The most important items to have are gloves and eye protection. When replacing halogen bulbs, it is absolutely essential that you do not touch the glass part of the new bulb with your bare hands. The oils from your skin can create a hot spot on the bulb, causing it to fail prematurely. Always handle the new bulb by its plastic or metal base. For safety, park the car on a level surface and engage the parking brake. While not always necessary, disconnecting the negative battery terminal is a good practice, especially if you are working near complex wiring.
Step-by-Step: Replacing a Halogen Headlight Bulb
Accessing a headlight bulb is typically done from behind the headlight assembly inside the engine bay. Pop the hood and locate the back of the headlight. You may need to remove a plastic engine cover for better access. You will see a round plastic cap or a rubber boot covering the back of the bulb socket. Twist this cover counter-clockwise to remove it.
Inside, you will see the electrical connector attached to the base of the bulb. This connector is usually held on by a small plastic tab that you need to press to release it. With the connector off, you can remove the bulb itself. Some are held in by a wire spring clip that you need to press and unhook. Others simply require a quarter-turn counter-clockwise to unlock from the housing. Once released, carefully pull the old bulb straight out.
Insert the new bulb, being careful not to touch the glass. Make sure it is seated correctly and lock it into place by re-engaging the spring clip or turning it clockwise. Reconnect the electrical plug, put the protective cap back on, and you are almost done. It's a good idea to test the light before you close the hood.
Step-by-Step: Replacing a Common Taillight Bulb
Taillight bulbs are generally easier to access than headlights. Open your trunk and pull back the carpet or liner directly behind the taillight assembly. You will find one or more plastic wingnuts or a small access panel. Undoing these will reveal the back of the taillight circuit board or individual bulb sockets.
To remove a bulb, grip the plastic socket, give it a quarter-turn counter-clockwise, and pull it straight out of the housing. The bulb itself can then be pulled straight out of the socket. Some bulbs, particularly dual-filament bulbs that serve as both a running light and a brake light, have offset pins and can only be inserted one way. Note the orientation of the old bulb before removing it.
Push the new bulb into the socket, then reinsert the socket into the taillight housing, turning it clockwise to lock it in place. Test the brakes, turn signals, and running lights to ensure everything works correctly before putting the trunk liner back in place. Some vehicles require you to remove the entire taillight assembly from the outside, which usually involves a couple of screws or bolts.
Special Cases: HID, LEDs, and Bumper Access
If your car has factory HID headlights, be extremely cautious. The ballast that powers these bulbs uses very high voltage, even with the car off. It's often recommended to disconnect the battery and wait several minutes before working on them. LED lights are typically part of a sealed unit. If an LED fails, the entire headlight or taillight assembly often needs to be replaced, which is a much more expensive and involved job.
On some modern, compact cars, accessing the headlight bulb may require you to go through the front wheel well by turning the wheels and removing a plastic liner, or in some extreme cases, by partially removing the front bumper. Your owner's manual will detail these more complex procedures.
Final Checks and Common Mistakes
After installing a new bulb, always test it. Turn on your lights and signals to confirm everything works as it should. If you disturbed the headlight housing significantly, it's a good idea to check your headlight aim against a garage door at night to ensure you are not blinding other drivers. Some cars with advanced electronics will display a "bulb out" warning that may need to be cleared after replacement.
The most common mistakes are touching the glass of a new halogen bulb, forcing a connector and breaking it, or forgetting to put the protective dust cap back on the headlight housing, which allows moisture and dirt to get in. Replacing a bulb yourself typically costs between $10 and $30 and takes 15 minutes, whereas a shop might charge $50 to $100 for the same simple task. It’s a quick win that keeps you safe, legal, and saves you money.